Keep Your Secrets Away From Code (Consul + Spring)
This post will walk you through the Consul cloud security platform, and how to integrate it with your Spring application.
Consul
According it’s documentation, “Consul is a distributed service mesh to connect, secure, and configure services across any runtime platform and public or private cloud.”
You can read more about Consul here.
Now, we are going to focus on the key/value store in Consul. The KV store is one of the major features available in Consul to have all your application configuration properties in one place.
Problem
Generally, we all are taught to have our application-related configurations in an application.properties file. Whenever we need to change the value, then we will be changing it in the file and have to rebuild and re-deploy the application to make changes to the application.
For instance, assume you have a secret key or password in your application.properties file. If there is any attack on your server and the code leaks, all your critical information and your system will become vulnerable.
Solution
Consul will actually help you to avoid the above-stated problems.
Why Consul KV
- You will be storing all your configuration properties in the Consul KV store which eliminates code leaks.
- Whenever there is a change in the key/value, you are not required to redeploy or reboot your server.
- Spring boot has an efficiency to reflect the values in your application instantly.
- One Consul instance is sufficient to have all your environment properties like dev, stage, and production protected.
Install Consul
There are multiple ways to install Consul:
- You can install it using Docker .
- You can download and run it on your local machine.
I have used the second approach, and downloaded the file and extracted it onto a local directory.
Steps to Start Consul
- Open your terminal.
- Go to the directory where you have extracted Consul.
Run the below commands:
root $ ./consul agent -server -bootstrap-expect=1 -data-dir=consul-data -ui -bind=127.0.0.1Open the browser and go to http://localhost:8500.
Now you will see a Consul screen.
Create KV in Consul
You can insert your KV into Consul in two ways:
- Using the command line tool.
- Using the browser.
Using the Command Line Tool
Run the below command to insert a single key:
root $ ./consul kv put config/testapplication/testkey testvalueNote: You need to maintain the above coding standard, i.e. config is mandatory followed by your application name and followed by your key name. Tables aren’t part of the core Markdown spec, but Hugo supports supports them out-of-the-box.
Follow this to insert multiple keys:
Create a .json file as follows
[
    {
        "key":"config/testApplication/testkey",
        value:"dGVzdFZhbHVl"
    },
    {
        "key":"config/testApplication/testkey2",
        value:"dGVzdFZhbHVls"
    }
]
Note: The value should be a Base-64 Encoded String.
Then run the below commands to import data’s to consul
root $ ./consul kv import @/your-file-path/filename.jsonTo know more about Consul KV commands, go here.
Using the Browser
- Open http://localhost:8500 in your browser.
Click key/value in the menu.
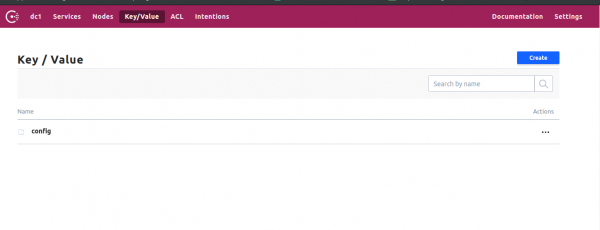
Click the Create button.
Enter the key as follows:
config/testApplication/testkeyEnter the value as follows:
test valueNote: You don’t have to encode the string in the case of the UI
That’s it, now Consul is ready to integrate with your application.
Steps to Integrate Consul With Your Spring Application:
- If you don’t already have a Spring application up and running, you can create one here.
Add the below dependency to the build.gradle file.
dependencies
{
    compile group : 'org.springframework.cloud', name :'spring-cloud-starter-consul-config'
    compile group : 'org.springframework.cloud', name :'spring-cloud-starter-consul-discovery'
    compile group : 'org.springframework.boot', name : 'spring-boot-starter-actuator'
}
The Spring actuator is mandatory so that Consul will keep checking the health status of your application.
Add dependency management to the build.gradle file.
dependencyManagement
{
imports
    {
        mavenBom "org.springframework.cloud:spring-cloud-dependencies:Finchley.SR1"
    }
 }
Create a bootstarp.yml file under src/main/resources as follows
spring:
  application: {name: 'testApplication'}
  cloud:
   consul:
    enabled: 'true'
    host: http://localhost
    port: 8500
    discovery: {healthCheckInterval: 300s}
Note: The application name should match the folder name you created in Consul under the Config directory.
Use the
@Valueannotation to bind the values from consul as follow@Component @RefreshScope public Class AppConfig() { @Value("${testKey}") private String values; }That’s it Spring Consul will take care of binding the values from consul to your application.
Note: - @RefreshScope annotation is used in the above class, which will say that, if there any changes in the consul then it will immediately refresh the values in the application without restarting. If you havent use @RefreshScope then you need to manually restart the system to apply your config changes - @RefreshScope will work with annotations like (@component, @service, @controller,@repository etc,) - Know more about @RefreshScope
Add
@EnableDiscoveryClientinto your main class.@EnableAutoConfiguration @EnableDiscoveryClient @SpringBootApplication public class TestApplication { public static void main(String[] args) { new TestApplication(TestApplication.class).run(args); } }Now run your application. It will look for Consul and the values will be bound.
Conclusion
That’s all! Now you have learned the importance of the Consul KV store and how to integrate it with your Spring application.